

Preparation of pathological sections
时间:2023-10-28
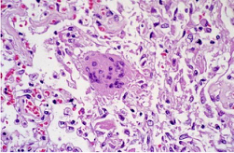
A type of pathological specimen, in which some diseased tissues or organs are treated with various chemicals and burial methods to fix and harden, cut into thin slices on a slicing machine, adhered to glass slides, stained with various colors, for examination under a microscope to observe pathological changes, make pathological diagnoses, and provide assistance for clinical diagnosis and treatment.
Pathological section
Preparation of pathological sections
1. Sampling
The specific requirements are as follows:
(1) Fresh material: The fresher the tissue, the better. Generally, human tissue should be quickly fixed after isolation and animal tissue should be killed to ensure its original morphological structure.
(2) Size of tissue block: The ideal volume of the tissue block taken is 2.0cm × 2.0cm × 0.3cm to allow the fixing solution to quickly and evenly penetrate into the tissue, but the ideal volume of the tissue block varies depending on the production material and purpose. For example, when making pathological external examination or scientific research sections, the tissue block can be thinly taken as 0.1-0.2cm, which can shorten the time for fixing, dehydration, and transparency. If the thickness of the teaching section is taken as 0.3-0.5cm, more teaching sections can be made from the same wax block.
(3) Do not squeeze tissue blocks: The knives and scissors used to cut tissue blocks should be sharp and not file back and forth during cutting. Do not clamp the tissue too tightly to avoid deformation of the tissue and cells due to compression.
(4) Standardized sampling location: It is necessary to accurately extract materials according to the anatomical location, and pathological specimens should be taken according to the different lesion locations and properties, and standardized according to requirements.
(5) Choose the section of the tissue block: Determine the direction of the section based on the tissue structure of each organ. Longitudinal or transverse sections are often the key to displaying tissue morphology and structure, such as for long tubular organs, transverse sections are preferred.
(6) Keep the material clean: If there is blood, dirt, mucus, food, feces, etc. on the tissue block, it can be rinsed with water before being placed in the fixing solution.
(7) Maintain the original form of the tissue: After fresh tissue is fixed, it may experience shrinkage to some extent, and sometimes even complete deformation. To achieve this, the organization can be flattened to maintain its original shape as much as possible.
2. Fixed
(1) Small piece tissue fixation method: This is the most commonly used method, where small pieces of tissue taken from human or animal bodies must be immediately placed in a liquid fixative for fixation. Usually, the ratio of specimen to fixative is 1:4-20, but the tissue block should not be too large or too thick, otherwise the fixative cannot penetrate quickly. Therefore, the size of the tissue block is generally 2.0cm × 2.0cm × 0.3cm.
(2) Injection and perfusion fixation method: Some tissue blocks require fixation of the entire organ or animal body due to their large volume or difficulty in infiltrating the fixed fluid. At this point, injection fixation or perfusion fixation should be used. Inject the fixative into the blood vessel and branch through the vessel to reach the entire tissue and body, thus obtaining sufficient fixation.
(3) Steam fixation method: For relatively small and thick specimens, osmic acid or formaldehyde steam fixation method can be used. If a blood smear is used, it should be fixed in contact with osmic acid or formaldehyde vapor before the blood smear is dried.
The most commonly used fixing solutions are 10% formaldehyde fixing solution and 95% ethanol fixing solution.
3. Dehydration and transparency
After the specimen is fixed and rinsed, the tissue contains a large amount of water, which must be replaced from the tissue block. This process is called dehydration. Whether it is slicing with paraffin or collodion, the moisture content in the tissue must be removed. Due to the incompatibility between the water containing tissue and embedding materials such as paraffin and collodion, the commonly used dehydrating agent is a series of different concentrations of ethanol.
The steps of dehydration are: 80%, 90%, 95%, and 100% ethanol of various concentrations for 2 hours, and this process can be completed automatically by the dehydration machine.
Acetone is also a dehydrating agent with strong dehydration ability, but due to its strong dehydration ability and severe contraction effect on tissues, this reagent is generally not used when making scientific research and teaching slices. Due to the insolubility of ethanol, acetone, and other solvents in paraffin, a solvent substitution process that is soluble in paraffin is called transparency. Commonly used transparent agents include xylene, chloroform, methyl salicylate, etc.
4. Soaking and embedding
(1) Immerse paraffin into the tissue to replace the transparent agent contained in the tissue.
(2) Embedding: The tissue soaked in wax is placed in melted solid paraffin, and after the paraffin solidifies, the tissue is encapsulated in it, called a wax block. This process is called embedding.
5. Slices and patches
(1) Trimming wax blocks: Depending on the size of the tissue, cut off the remaining wax at a distance of approximately 0.1-0.2cm from the edge of the tissue, otherwise it may cause uneven tissue shrinkage.
(2) Prepare slicing tools: a slicing knife, a writing brush, ophthalmic forceps (curved), and a temperature controller for drying and bleaching.
(3) Install wax block: Install the repaired wax block onto a metal or wooden wax holder.
(4) Install the slicer: Install the slicer on the cutting table of the slicer, tighten the fastening screws on the table to prevent vibration during slicing and maintain a certain slice thickness.
(5) Slice thickness: The thickness adjuster of the slicer is engraved with 0-50 μ M or 0-25 μ m. The thickness can be arbitrarily selected, and the thickness of paraffin slices is generally 4-6 μ M.
(6) Slicing
(7) Slice laying: Use ophthalmic forceps to pick up the wax strip and gently lay it on the water surface at 40-45 ℃. By using the tension and temperature of the water, the slightly wrinkled wax strip will be naturally flattened.
(8) Patch and drying: After the slices are fully flattened on a constant temperature water surface, the wax slides are scooped up to the middle of the slide and the remaining water on the slide is poured out. The slides are placed in a 60-65 ℃ constant temperature box or the drying oven of the slice drift drying temperature controller for 15-30 minutes to remove the paraffin wax from the melted tissue gap.
6. Dyeing and sealing
The commonly used staining method is Hematoxylin Eosin staining, abbreviated as H.E staining. This method can be used for any fixed liquid fixed tissue and slices using various embedding methods. Hematoxylin is an alkaline dye that can dye basophilic substances in tissues blue, such as chromatin in the nucleus; Eosin is an acidic dye that can dye eosinophilic substances in tissues red, such as the cytoplasm and nucleoli of most cells that turn red in H.E stained sections.
H. The dyeing process for E is as follows: dewaxing, debenzene removal, rehydration, dyeing, dehydration, transparency, and sealing.
The contrast staining in conventional hematoxylin staining is using eosin, and in recent years, some laboratories in the UK and the United States have used flame red. In addition, orange G, Biebrich scarlet, Bordeaux red, etc. are also used as contrast staining. Eosin is a commonly used dye for staining cytoplasm, collagen fibers, muscle fibers, and eosinophilic particles.


 鄂公网安备42090202000178号